
In order to look more profession and serious online, its always best practice to use a custom Email ID for your website. I’ve come a cross many startup companies and Bloggers using public Domain email address, for example those offered by google or yahoo. Personally i don’t see a reason one would choose to use a free address, while she/he already owns a domain name.
If you’ve purchased a domain, make use of Domain specific custom Email ID like Admin@yourdomain.com or info@yourdomain.com. Not only does doing this show high levels of professionalism, it also makes you look more serious and authentic online. We have numerous web services that can be used to create domain specific email address. Personally i would recommend using Google Apps for work as its one of the best out there. This is mainly because google Apps for work integrates with all other google services
In this guide I am going to guide you step by step on how to create your Custom Email ID using google apps. Note that some the screen shots in this guide might change from time to time as google keeps on updating their websites. But, the process will remain the same and quite easy to follow.
I a going to outline them step by step to keep the procedure simple and easy to follow.
Steps to Register a Custom Email ID at google apps
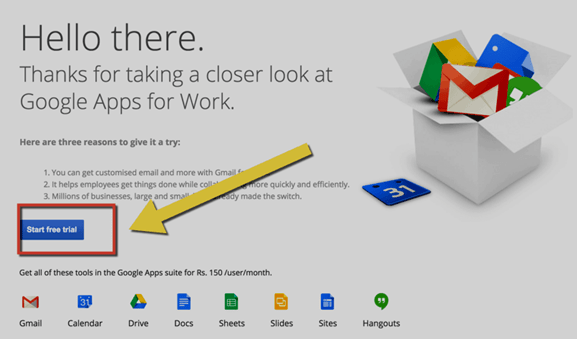
- Go to google apps sign up page. You can follow the link I’ve provide. For startup, use the free trial version. It allows you to enjoy one full month for free.
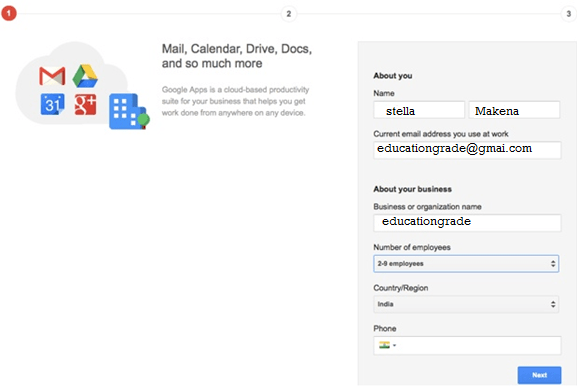
- After clicking on the Free trial button, you will be taken to the next page. On this page, enter your signing up details
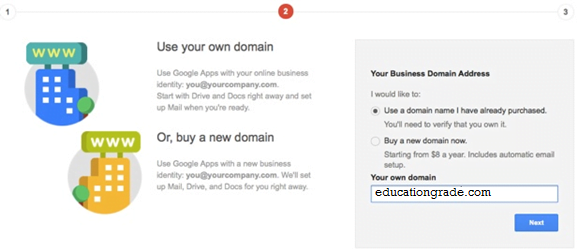
- Click on next. This page offer an option to purchase a new domain from google or use any of your existing domain. Click on the option that says “Use a Domain name that I have already purchased”. If you don’t have a domain check the second option.
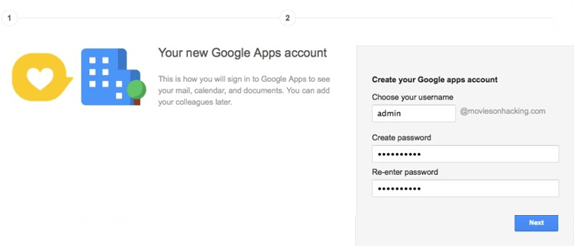
- Next page. This allow you to create your first Apps username and password. Use only the email address your likely to use. This is because google Apps will charge you on a monthly basis. Fewer email address results to a low monthly expense.
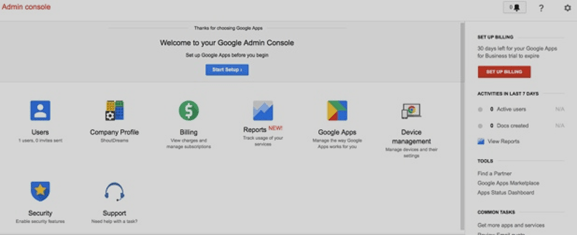
- After choosing user name and password click next This will automatically redirect you to admin dashboard of your google apps account. Lets have a look at how the admin console looks like.
.
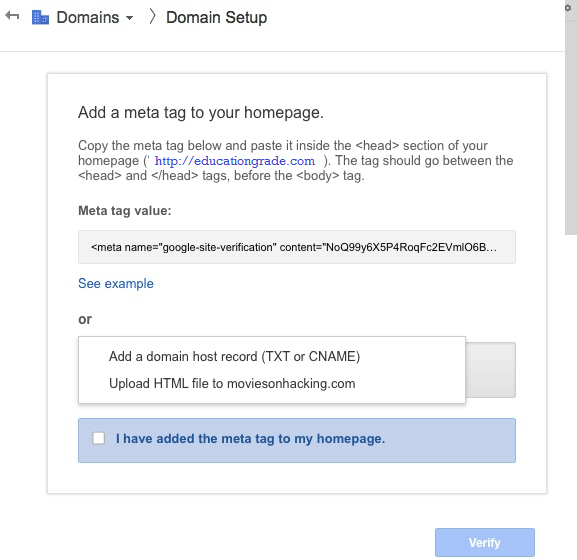
- At this stage, we first require to verify our Domain ownership. This can be done in multiple ways. We can add a meta tag created in our website or add a Txt record. I like the Meta tag since its easier and i have already added a meta tag in my WordPress site.
- After verifying Domain ownership, the next step is setting up emails for your Domain. After Verify, click Next to be redirected back to the admin console. Click on setup email icon to start setting up your custom Email ID. With google Apps tool, everything is customized and hence very easy to use. It does not require much technical knowledge to run. Google will automatically detect your hosting provider and automatically provide you with setup instructions
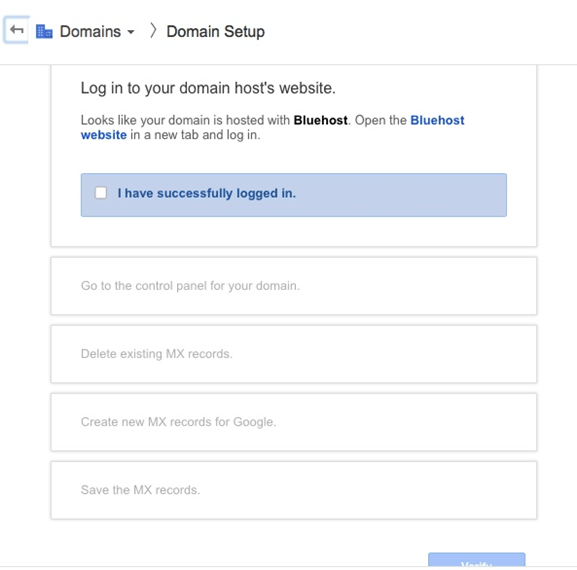
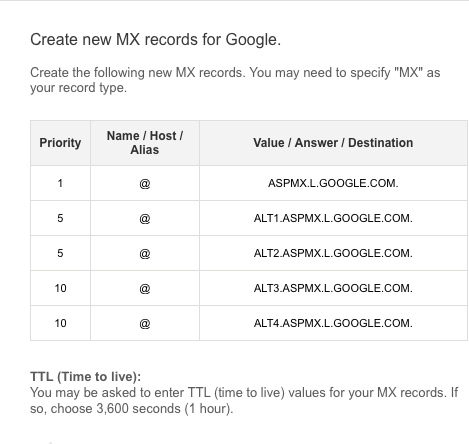
- Your almost done. Next two steps and you will be up and running. Delete all existing MX record in your current hosting service account and add the MX record provided by google Apps email setup console.
That’s it. Your Custom Email ID s set up and read to go. Within next 24 hours google will check your MX record and activate your mail. That bring us to the end of our discussion. Make good use of this and personalize a email address for your domain. Remember having a custom email ID will make look good, serious and professional online. Kindly share your thoughts and opinions on how to make the article better via comment section below.