
If you want to install google analytics in WordPress, then your in the right place. Its highly important as a website admin to know how your audience interacts with your website. Without a means of tracking your traffic statistics, this could be next to impossible. Google Analytics help webmasters track their traffic statistics for free. In this article, am going to guide you on how to install google analytics in WordPress blogs (step by step). Also I will share why its so important so implement traffic analysis in any blog.
Why is google analytics so Important for website admins?
Am sure your reading this guide because your already a website administrator. If not please check my step by step guide on how to create your own website in less than 30 minutes here. Once you create your blog, your number 1 goal will be getting traffic and website subscribers. Google Analytics helps you in keeping track of all that for free!. Lets discuss top most important reasons you should be using google analytics as a website administrator.
1. Who Visits your blog?
This is another cool feature of google analytics. It lets you know your audience in-terms of geographical location, which browser they use and the language, among others. As a blog admin, such info is very important in making sure your blog is compatible with your audience.
For example, google analytics will give you statistics of screen resolution and flash support of your audience. Hence, with small screen resolutions audience, you will avoid flash elements and large resolution elements. All that, thanks to google analytics.
2. What does your audience do while on your website?
Google Analytics will allow you to track what content users visit on your website. It keeps a record of each page view, and how long they stay on your website. Best known as the website bounce rate. The bounce rate will help blog admin know the percentage of users who left your blog o first visit. This info is very important since it lets admins know which part to improve and which are doing good.
3. When do people visit your website.
This is Maybe one of the most important factor to consider if you want to improve your website page views. Armed with knowledge of the hottest hours of your blog visits, you will know when to publish most. You can also schedule your post to meet that particular time zone.
4. How do people find your website?
Where does your your website visitors come from? Do they come from search engine results, Direct links or other referral links. Other referral links, I mean from from social media like Facebook, twitter WhatsApp, Telegram etc. This is another awesome feature that comes with google analytics
This will also show you what percentage of visitors you received via all the above sources. When it comes to driving traffic to your website, google analytics will show you which sources are doing good and which to work on. If your most traffic comes from Facebook for example, then as a web admin, you need inclusive content on twitter to acquire as much traffic.
Google analytics gives you an advantage to focus on strategies that really work for you. Hence i recommend to simply move away from the guess work and focus on strategies that work. Make date driven decisions.
Lets jump in to our subject of topic, How to install google analytics in WordPress, step by step guide.
First, to use google analytics you need to sign up. Its free to use, hence if you don’t have an account, its easy to get one. Follow the below simple steps to sign up.
1. First step is signing up for google analytics account.
To sign up for google analytics, just visit google analytics here. This link will take you to the screenshot shown below. If you already have a Gmail account, you will only be required to sign-in. If you don’t have a Gmail account you can create one. The procedure to create an account is self explanatory.
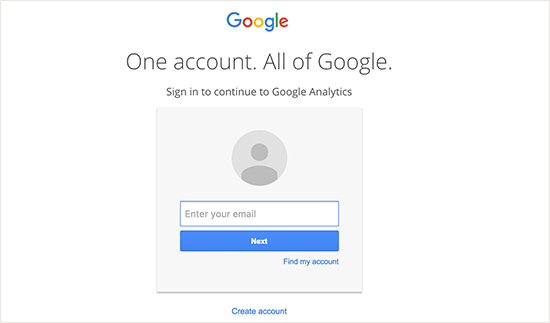
2. Step 2 sign-in with your Gmail account.
Once you sign up, you will be prompted to the screen shot shown below. This is the point where you use your gmail account to sign up to google analytics.
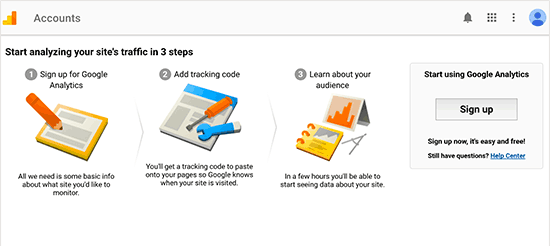
3. Step 3 select your website.
After you click next, the screen will ask you to select either a website or mobile app. Select the website option as shown on the next shot. Then enter your account name which is the name of your website. (i.e without the http:// and www. part ), Your website URL, Country and your time zone.
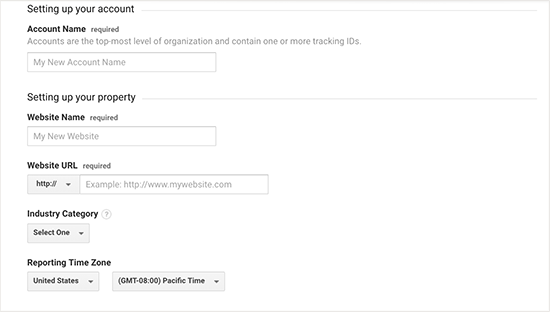
After you enter all the required information on the above screen shot, just click on the ”Get tracking ID button. You will be presented with agree with google terms prompt, which you must agree to proceed.
After you click on the agree with terms and conditions, you will be presented with your google analytics code. It looks like the screen shot shown below.
I recommend leaving this browser open, since you might be required to revisit the page after installing the analytics code on your website. The above guide covers all you require to setup your google analytics account. Next lets cover How to install google analytics in WordPress blog.
How to Install Google Analytics in WordPress
We have many different ways to install google analytics in WordPress. I am going to cover the easiest and fastest way. It doesn’t require use of plugins, and personally I discourage use of unnecessary plugins, since more plugins result to a slow loading website. Am going to cover how to install google analytics code in WordPress theme
How to install google analytics in WordPress Theme
This is the simplest method to add your google analytic code in your WordPress theme. The only flaw about this method is that your code will disappear if you update your blog theme. But a copy paste procedure should be a walk in the park, even for tech idiots.
Hence all you need to do is simply edit your header.php file in your WordPress theme. Just copy your google analytics code and paste it in between your <header> and /<header> tag. that’s between your header opening and closing tags. After that your your site is good to go. Just to mention, some times it might take up to 24 hours to receive real time traffic hits. So, if you don’t see traffic hits immediately, check back later.
For a one on one help, just share your experience or difficulties via the comment section below. Lets have an awesome blogging experience.